Summary
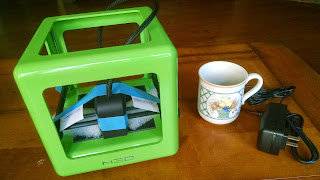
The M3D Micro 3D Printer is a great starter printer for people looking for low price, small object printing only, space efficiency and simplicity. It often produces good results with simple object models and hides most of the technical details from the user. The M3D is an absolutely miniature cube - measuring about 7.5" in all dimensions - and it looks almost elegant on your desk. It's also not too noisy (compared to other printers). The company offers decent filament (1.75mm) and color choices, and while it seems you're best off buying theirs, for which their printers are pre-programmed to heat and extrude correctly, I suspect using filament from other providers is feasible. In the $350 price range, I think the M3D is a great starter printer.The main issue I'd like to see resolved (as with all 3D printers) is bed adhesion. I'll continue to look for a recommended solution here - and i'm confident there is one.
There are some things I'm not as happy about, which I've included in a separate section at the bottom of this post - be sure to read those. Overall, in these still early days of #3DPrinting, the M3D hits a hot spot in the market and is a player in that inexpensive, starter printer space. One caveat - I have NOT compared this printer to others in it's class - and there are some that come close to that price point, but not many so focused on non-technical users so far. I suspect there will be many more in the coming year.
Unpacking - Out Of Box Experience
 The size and light weight of the box that arrived was shocking. I was sure the 3 rolls of filament I ordered (at $13 per roll) was all I would find inside - but no - the whole printer, assembled, with power supply and 3 rolls of filament was all in that box weighing only about 4.5 pounds! The bright green color of the printer made it a delight to see (they come in several bright colors).
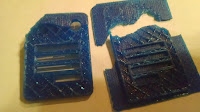
The printer seemed so simple from a mechanical standpoint, that the packaging to secure it was also simple. A bit of blue tape and a couple of plastic holders held things in place and had to be removed before using the printer. Very simple. I found out later that those plastic holders were printed on MY printer as a pre-shipment test run (they should have told me that in the packaging).
Setting Up - Getting ready to print
 I clearly got my printer during the early days of M3D's production-delivery business being set up, so you won't experience the piece of paper with super long dropbox URLs to painstakingly transcribe into your browser like I had to endure (that was harder than it sounds). They've moved to short-link URLs (duh).
The main #facepalm horrific moment was discovering that the printer requires proprietary software which, for the moment, is still Windows only. Without a single windows machine in my house, I panicked (overstatement), and after trying to find their Mac Beta software, and hearing that it was not yet stable, I actually went out and bought a super cheap, open-box special, windows machine at Best Buy. While the PC was cheap, this certainly added to my total cost to try this printer. "It better be good" is all I could think.
I installed the M3D software and plugged in the printer. The software quickly identified that my printer needed a firmware update - which finished in just 15 seconds. I did not see any filament hanging out of the hot end, so I assumed there was none and that no test print was done. I followed the directions in the pdf manual online (another looooong URL to type in!) for loading the filament. They have a "filament code" system to make it easy to prepare the printer with the right slicing and printing parameters. In my case (again, accepting that this is just growing pain of a new product) the software first didn't accept codes, and then when I updated it and it did, one of my filament spools didn't have a code. I found my answers online and got back on track.
I was slightly disappointed that "internal filament" was not an obvious choice, as when I saw the printer at the public show, it looked like the filament spool can be loaded under the print bed, making it an even smaller and simpler footprint on the desktop. I left the filament external and moved on.
 First Print
I figured a small, simple model - like my Google Docs Logo keychain - would be good as a test. It's small, and has plenty of bottom surface to adhere to the bed.First try failed. Turns out there was some filament in the printer - so my loading the new filament wasn't completely successful and the first print had to be aborted when I saw that the first few layers were mostly blank and the filament only started really extruding after layer 6 or so. Good news was that the "abort" button on the M3D software works :)
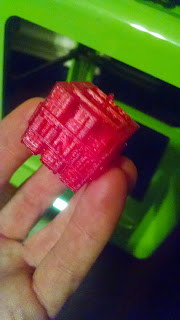
 Second try was mostly a success with one caveat. As in all 3D printing, adhering to the bed is challenging. M3D solves that my printing a "raft" under every print. In fact, the first version of software that I had did not include an option to turn that off (now it does). The Docs Logo model looked great (!) but because of the flatness of the model, I simply could not remove the raft without ruining the object. You can see in the pictures what the result was - as my object split or simply ended up with a very rough bottom.
Second Print and beyond
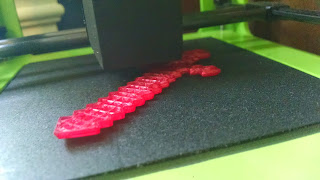
I have a small "link" model that I use for snap-together parts, which is small enough to print fast, but has enough detail to test the printer's capabilities. Here is where I realized some limitations of the printer, at least on the "fast" and "medium" settings. The linkage detail, which makes that object snap together with other objects - requiring accuracy of less than 1mm - simply did not print well enough to be functional. This tiny model also had way too little surface area on the bed, so it came un-done during printing on more than one occasion. I decided to stick to simpler models, and most of these worked pretty well.Bed Adhesion (of course)
 |
| You can see the model separating from the bed |
Some things I'm less happy about...
The software is "ok", but not well designed from a user-experience perspective (for example, it doesn't show me how long a print actually took) and has an interface which only a windows user could love ;). The lack of Mac software is temporary, as M3D offered me access to an early test version (not yet stable) - but I expect that will be launched soon. Worth noting for you experienced 3D Printing enthusiasts, the software gives you access to "advanced mode" - but they give a caveat that it may void the warranty. I understand this - but I think it's problematic given the likelihood that many of their customers will be experienced in these early days particularly.The lack of explanation of how to internally install filament is mostly just disappointing, but it also leaves me without an elegant way to hold my filament externally (there's no spool holder).
The filament itself - at least the blue and red - are somewhat translucent, almost sparkly, which is ok if you want that look, but for a flat solid color, I'm hoping their other filament choices are more opaque.
One important note: The company response has steadily improved over the few weeks I've had this printer, and they've been incredibly honest about their challenges and complete in their followup once they do. I hope they can compete in this incredibly competitive 3D Printer market.


Thanks for the review. I have been thinking of getting my good friend a M3D to get him into the 3d printing world. Seems like they have quite a ways to go with their user experience and I may have to help him get started instead of just giving to him and let the instructions do the job.
ReplyDeletePrint Speed: How does it compare to your Taz? I heard the Micro is SLOW! Like double the time.
ReplyDelete